| title | next | nexttitle |
|---|---|---|
Intro Tutorial to Glitch |
1-basics-1 |
Basics 1 - Primitives |
This course is structured using the Glitch platform. Glitch is a web platform that provides you with a free JavaScript based server for your projects.
This course is a Glitch project that you can copy and modify.
- Start by signing in on https://glitch.com/ so that you can save your work.
- Go to https://glitch.com/ and click "Sign in"

-
Remix the A-Frame Course project
-
Go back to http://aframe-course.glitch.me/index.html and click on the "Remix on Glitch" button to create a copy of this project.

- This will create a copy and take you to the editor of Glitch

After you have "Remixed" the course project, let's see how you can go back to it after you log out.
- Log out
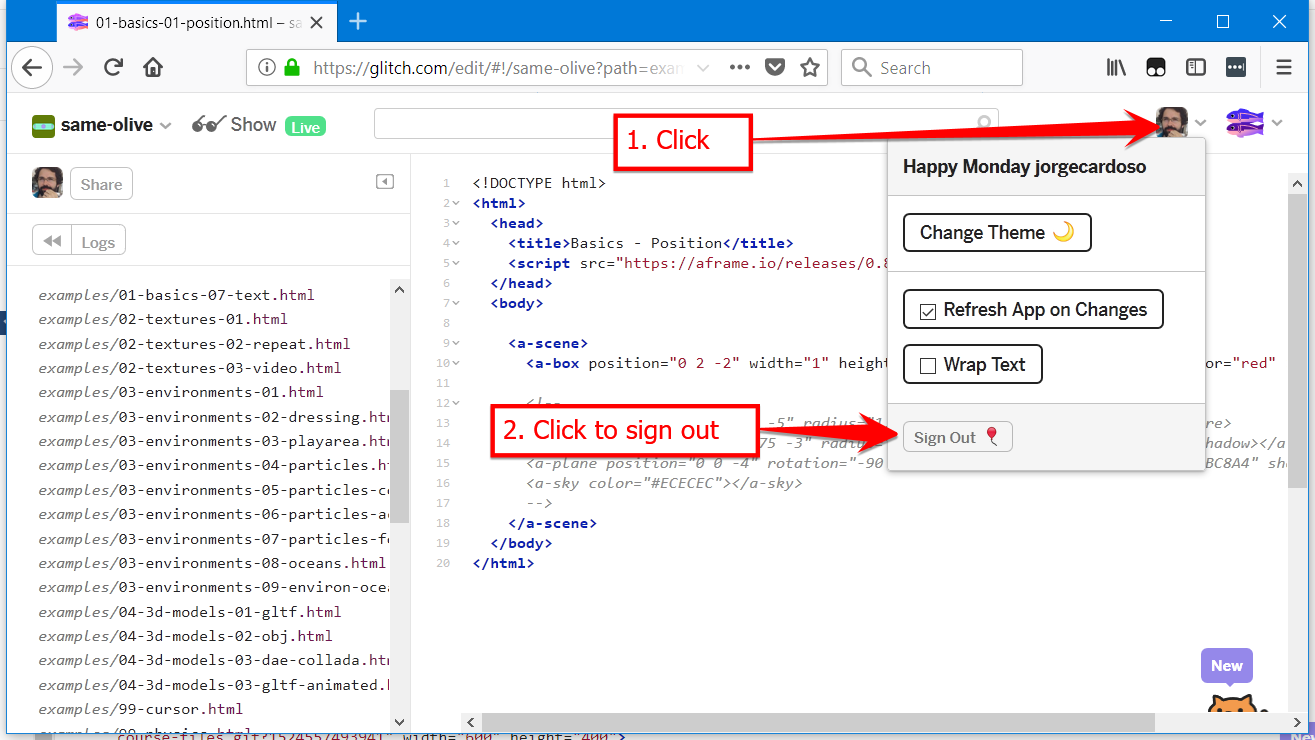
- Log in again
- Locate your project

- Click edit

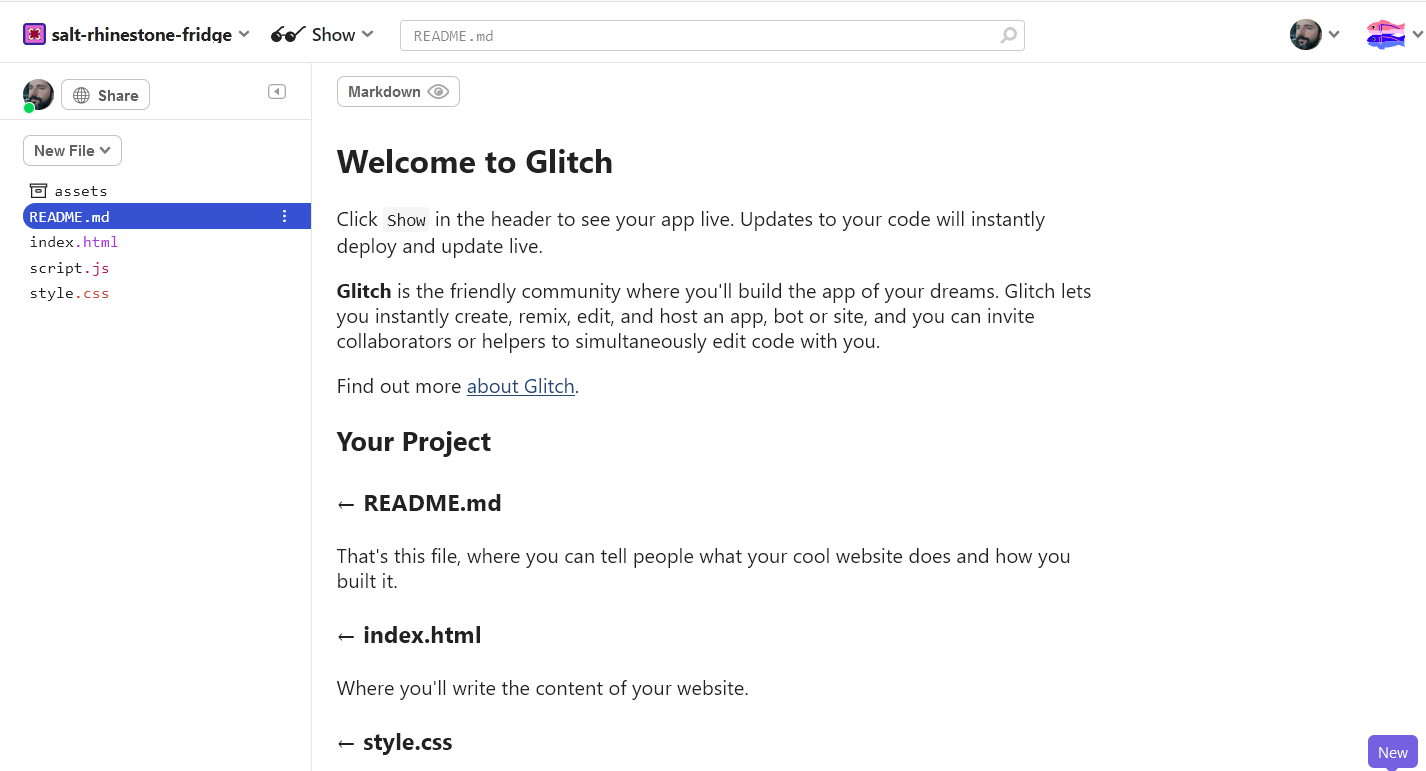
You are now back at the editor.
The Glitch editor is a simple file editor.
- You can see a list of files on the left
- Clicking a file will open it in the file editor to the right
- There is also an "Assets" folder for putting media files
The project you have Remixed contains all the examples and lessons.

If you scroll the file list to the left you will see:
-
Assets. This is a special folder in Glitch. If you click it, you will see various images inside it. Do not delete these images because they are being used by the Examples and Lessons.
-
Examples. Inside the "folder"
examples/. These are the most important files for the course and the ones you will edit or copy to create your own. -
Course lessons. These are files that end in
.md. You should not edit these, although there is no big problem in doing so because the course lessons can always be read in the original course site at https://aframe-usj.glitch.me/index.html -
Additional files. Files ending in
.js,.json, or.cssthese are helper files that you should not change or delete. -
In particular, the file
server.jsis important so do not delete it or change it.
Let's now see how to make changes and how to see the result.
Let's start by adding an asset. Look for an image in your computer and upload to the Assets in Glitch by following these steps:
- Go to the Assets folder

- After you have uploaded the image click on it
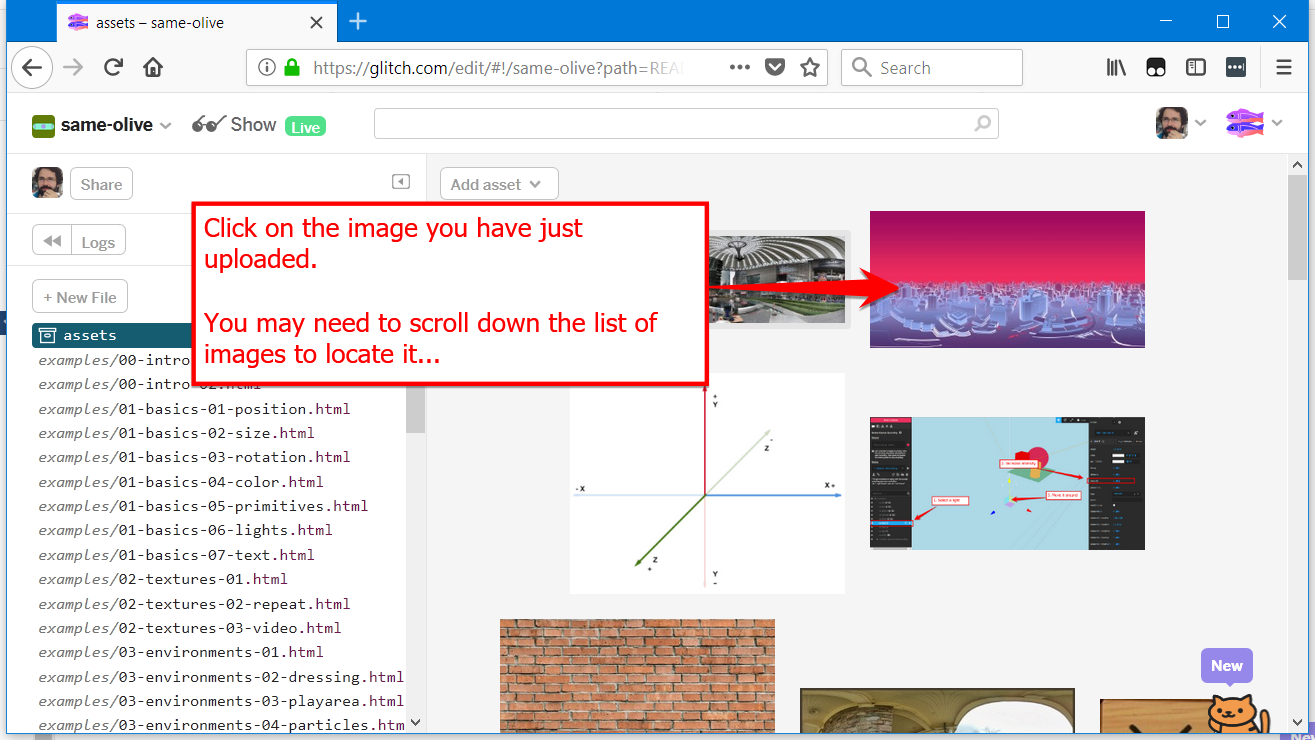
- Copy the URL of the image
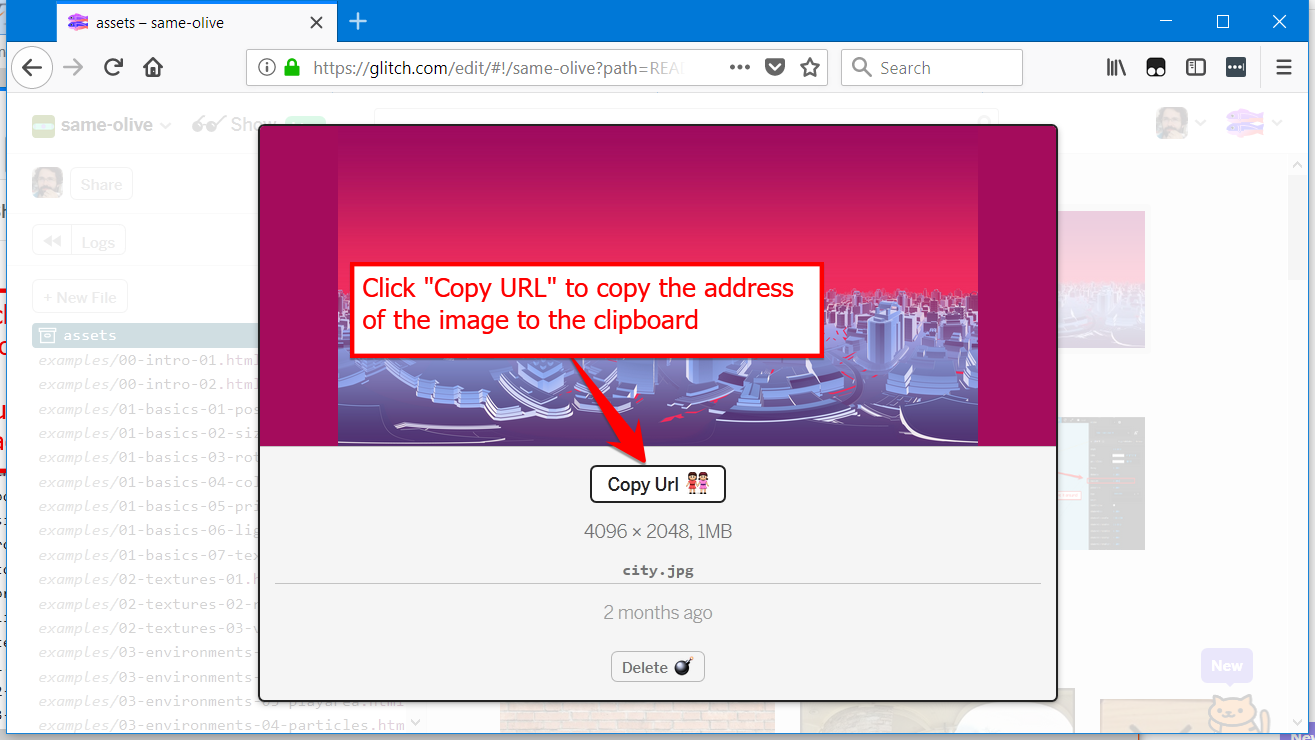
We will now use this URL to change a simple example and see the result with your image on it.
Let's edit the file that creates the following example so that is displays the cube with the image you have just uploaded: :::example 00-intro-01
- Follow the steps in the picture:

To view a specific file on your browser you just need to append the file's name to the address of your Glitch project:
- Click on the "Show Live" button at the top of the Glitch Editor

