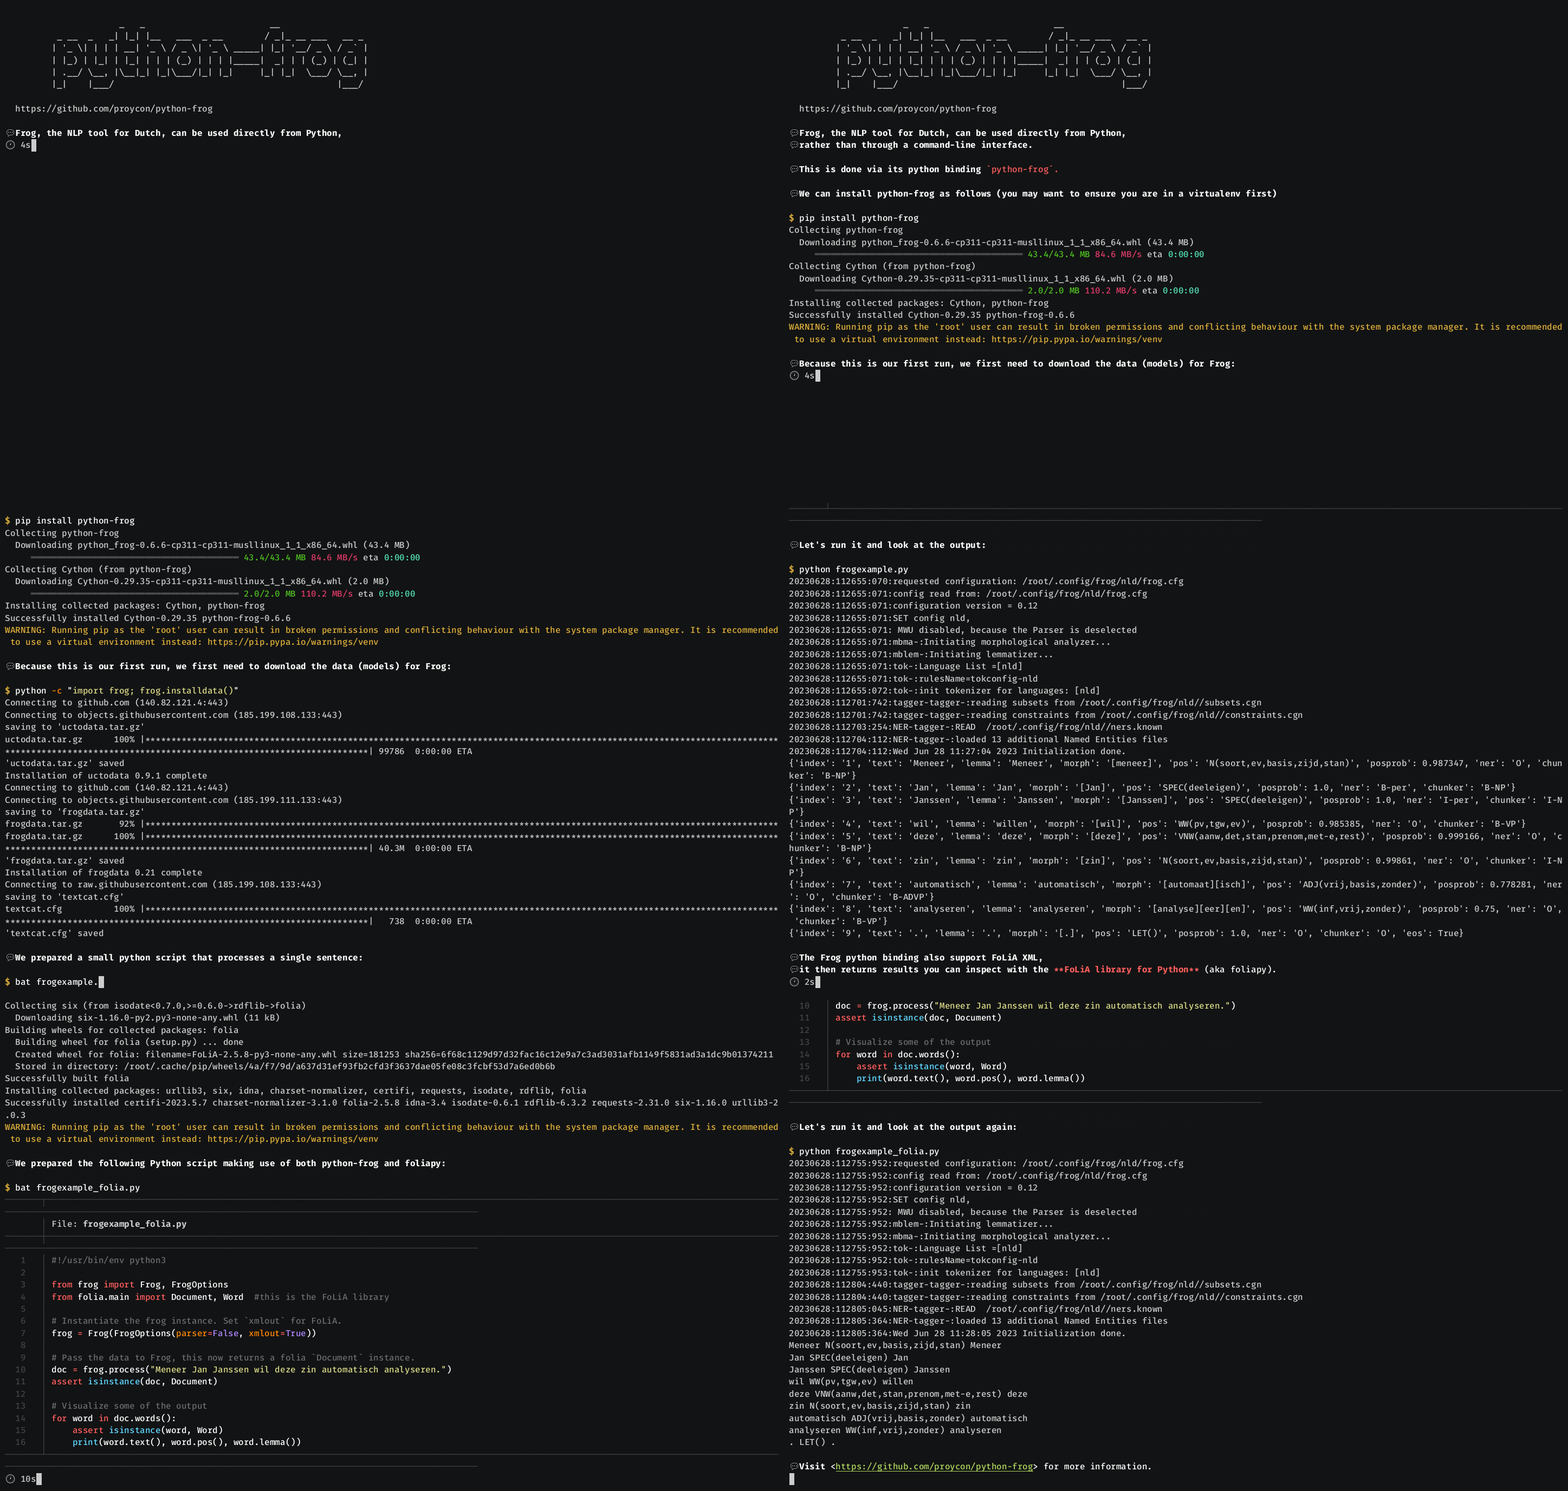
This is a Python binding to the Natural Language Processing suite Frog. Frog is intended for Dutch and performs part-of-speech tagging, lemmatisation, morphological analysis, named entity recognition, shallow parsing, and dependency parsing. The tool itself is implemented in C++ (https://languagemachines.github.io/frog). The binding requires Python 3.6 or higher.
We recommend you use a Python virtual environment and install using pip:
pip install python-frog
When possible on your system, this will install the binary
Python wheels that include Frog and all necessary dependencies except for
frogdata. To download and install the data (in ~/.config/frog) you then only need to
run the following once:
python -c "import frog; frog.installdata()"
If you want language detection support, ensure you the have libexttextcat package (if provided by your distribution) installed prior to executing the above command.
If the binary wheels are not available for your system, you will need to first
install Frog yourself and then
run pip install python-frog to install this python binding, it will then be
compiled from source. The following instructions apply in that case:
On Arch Linux, you can alternatively use the AUR package .
On macOS; first use homebrew to install Frog:
brew tap fbkarsdorp/homebrew-lamachine
brew install ucto
On Alpine Linux, run: apk add cython frog frog-dev
Windows is not supported natively at all, but you should be able to use the Ucto python binding if you use WSL, or using Docker containers (see below).
A Docker/OCI container image is available containing Python, frog, and python-frog:
docker pull proycon/python-frog
docker run -t -i proycon/python-frog
You can also build the container from scratch from this repository with the included Dockerfile.
Example:
from frog import Frog, FrogOptions

frog = Frog(FrogOptions(parser=False))
output = frog.process_raw("Dit is een test")
print("RAW OUTPUT=",output)
output = frog.process("Dit is nog een test.")
print("PARSED OUTPUT=",output)
Output:
RAW OUTPUT= 1   Dit     dit     [dit]   VNW(aanw,pron,stan,vol,3o,ev)
0.777085        O       B-NP
2       is      zijn    [zijn]  WW(pv,tgw,ev)   0.999891        O
B-VP
3       een     een     [een]   LID(onbep,stan,agr)     0.999113        O
B-NP
4       test    test    [test]  N(soort,ev,basis,zijd,stan)     0.789112
O       I-NP


PARSED OUTPUT= [{'chunker': 'B-NP', 'index': '1', 'lemma': 'dit', 'ner':
'O', 'pos': 'VNW(aanw,pron,stan,vol,3o,ev)', 'posprob': 0.777085, 'text':
'Dit', 'morph': '[dit]'}, {'chunker': 'B-VP', 'index': '2', 'lemma':
'zijn', 'ner': 'O', 'pos': 'WW(pv,tgw,ev)', 'posprob': 0.999966, 'text':
'is', 'morph': '[zijn]'}, {'chunker': 'B-NP', 'index': '3', 'lemma': 'nog',
'ner': 'O', 'pos': 'BW()', 'posprob': 0.99982, 'text': 'nog', 'morph':
'[nog]'}, {'chunker': 'I-NP', 'index': '4', 'lemma': 'een', 'ner': 'O',
'pos': 'LID(onbep,stan,agr)', 'posprob': 0.995781, 'text': 'een', 'morph':
'[een]'}, {'chunker': 'I-NP', 'index': '5', 'lemma': 'test', 'ner': 'O',
'pos': 'N(soort,ev,basis,zijd,stan)', 'posprob': 0.903055, 'text': 'test',
'morph': '[test]'}, {'chunker': 'O', 'index': '6', 'eos': True, 'lemma':
'.', 'ner': 'O', 'pos': 'LET()', 'posprob': 1.0, 'text': '.', 'morph':
'[.]'}]
Available keyword arguments for FrogOptions:
- tok - True/False - Do tokenisation? (default: True)
- lemma - True/False - Do lemmatisation? (default: True)
- morph - True/False - Do morpholigical analysis? (default: True)
- daringmorph - True/False - Do morphological analysis in new experimental style? (default: False)
- mwu - True/False - Do Multi Word Unit detection? (default: True)
- chunking - True/False - Do Chunking/Shallow parsing? (default: True)
- ner - True/False - Do Named Entity Recognition? (default: True)
- parser - True/False - Do Dependency Parsing? (default: False).
- xmlin - True/False - Input is FoLiA XML (default: False)
- xmlout - True/False - Output is FoLiA XML (default: False)
- docid - str - Document ID (for FoLiA)
- numThreads - int - Number of threads to use (default: unset, unlimited)
You can specify a Frog configuration file explicitly as second argument upon instantiation, otherwise the default one is used:
frog = Frog(FrogOptions(parser=False), "/path/to/your/frog.cfg")A third parameter, a dictionary, can be used to override specific configuration values (same syntax as Frog's
--override option), you may want to leave the second parameter empty if you want to load the default configuration:
frog = Frog(FrogOptions(parser=False), "", { "tokenizer.rulesFile": "tokconfig-nld-twitter" })Frog supports output in the FoLiA XML format (set FrogOptions(xmlout=True)), as
well as FoLiA input (set FrogOptions(xmlin=True)). The FoLiA format exposes more details about the linguistic
annotation in a more structured and more formal way.
Whenever FoLiA output is requested, the process() method will return an instance of folia.Document, which is
provided by the FoLiApy library. This loads the entire FoLiA document in memory and
allows you to inspect it in any way you see fit. Extensive documentation for this library can be found here:
http://folia.readthedocs.io/
An example can be found below:
from frog import Frog, FrogOptions

frog = Frog(FrogOptions(parser=True,xmlout=True))
output = frog.process("Dit is een FoLiA test.")
#output is now no longer a string but an instance of folia.Document, provided by the FoLiA library in PyNLPl (pynlpl.formats.folia)
print("FOLIA OUTPUT AS RAW XML=")
print(output.xmlstring())

print("Inspecting FoLiA output (just a small example):")
for word in output.words():
    print(word.text() + " " + word.pos() + " " + word.lemma())