-
Notifications
You must be signed in to change notification settings - Fork 17
Staging
This section gives you an overview of how staging works for the provided constructs, how to work with it, and (if you don't need it) how to remove it.
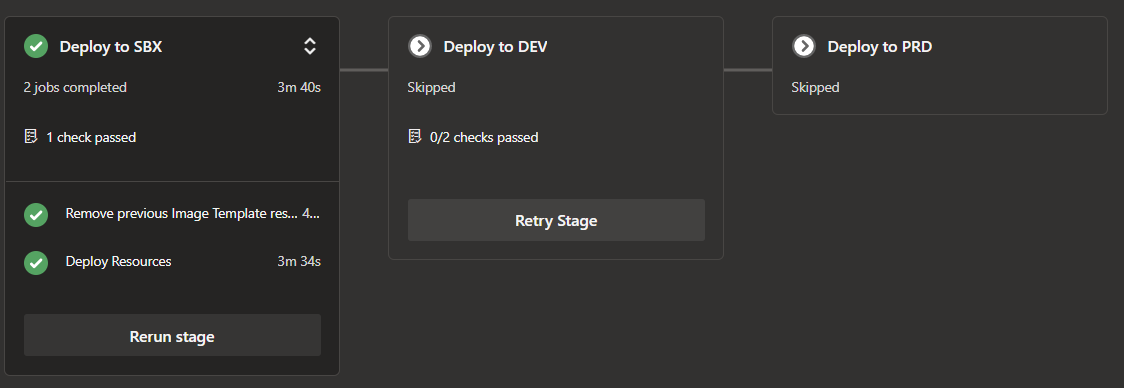
The solution comes with 3 pre-configured stages, SBX, DEV & PRD, and each pipeline deploys sequentially into these environments. However, you can also decide to deploy into an environment directly.

To this end, pipeline variables and parameter files are named as per the environment they belong to:
- Deployment (Bicep) files (in a
deploymentFilesfolder):<env>.<name>.bicep(for example:sbx.image.bicep) - Pipeline variables (in a
variables.ymlfile):<name>_<env>(for exampleserviceConnection_sbx)
Upon triggering a pipeline, the corresponding stage will select the correct parameter file(s) and pipeline variable(s). For an exemplary SBX stage this could look like:
stages:
- stage: SBX_Deployments
  displayName: Deploy to SBX
  # Comment: Only start if the pipeline runtime parameter 'startEnvironment' was set to sbx
  condition: and(succeeded(), eq('${{ parameters.startEnvironment }}', 'sbx'))
  jobs:
  - template: .templates/pipeline.jobs.yml
    parameters:
      # Comment: Passed to template to set environment & select the correct parameter file (see next example)
      environment: 'sbx'

- stage: DEV_Deployments
  displayName: Deploy to DEV
  # Comment: Only start if the pipeline runtime parameter 'startEnvironment' was set to sbx or dev (=> Continous deployment)
  condition: and(succeeded(), in('${{ parameters.startEnvironment }}', 'sbx', 'dev'))
  jobs:
  - template: .templates/pipeline.jobs.yml
    parameters:
      # Comment: Passed to template to set environment & select the correct parameter file (see next example)
      environment: 'dev'
NOTE: The
${{ parameters.<name> }}'notation corresponds to the pipeline's runtime parameters (on top of the file) and is not to be confused with deployment parameter files (for examplesbx.parameter.bicep).
In the pipeline.jobs.yml file, the values passed in as template parameters (for example environment: sbx) could then further be used like:
jobs:
- deployment: deploy_job
  displayName: Deploy Resources
  # Comment: Creates an Azure DevOps environment that allows you to set approvers
  environment: ${{ parameters.environment }}
  timeoutInMinutes: 120
  pool:
    # Comment: Leverges the correct self-hosted / ms-hosted agent based on the environment template parameter
    vmImage: '$(vmImage_${{ parameters.environment }})'
    name: '$(poolName_${{ parameters.environment }})'
  strategy:
    runOnce:
      deploy:
        steps:
          - task: AzurePowerShell@4
            displayName: 'Some script'
            inputs:
              # Comment: Reference a variable from the variables.yml file
              azureSubscription: '$(serviceConnection_${{ parameters.environment }})'
              ScriptType: InlineScript
              inline: |
                # Comment: Access the correct parameter file as per the stage's 'environment' template parameter
templateFilePath = '${{ parameters.environment }}.image.bicep'With the fundamentals established, let's take a look into how to interact with the stages.
As mentioned previously, the constructs come with differently named parameter files per stage (for example sbx.bicep) and variables in the variable.yml file (for example serviceConnection_sbx).
The first thing to do when configuring the environment, is to add/remove parameter files or variables as per your requirements (i.e. if you need more or less stages) and also update the pipeline.yml file that consumes these (i.e. add / remove stages & optionally also update the pipeline's runtime parameters & conditions).
Once set, you have to update the values as per your requirements. For example, when selecting a virtual network for a Managed DevOps Pool, you will most likely use a different one for each environment. Hence navigate to the corresponding parameter files and update each value to match the configuration of this environment.
Example:
-
sbx.bicepsubnet: { id: 'subscriptions/11111111-1111-1111-1111-111111111111/resourceGroups/rg-ado-agents/providers/Microsoft.Network/virtualNetworks/vnet-pool/subnets/poolsubnet' }
-
dev.bicepsubnet: { id: 'subscriptions/22222222-2222-2222-2222-222222222222/resourceGroups/rg-ado-agents/providers/Microsoft.Network/virtualNetworks/vnet-pool/subnets/poolsubnet' }
The same is true for the pipeline variables. For example, you may use a different service connection for different stages/environments. Hence you have to update the value in the pipeline's variable.yml file accordingly.
Example:
serviceConnection_sbx: 'sbxConnection'
serviceConnection_dev: 'devConnection'
Note: If you use different or additional names than SBX, DEV or PRD, make sure the variable naming schema & parameter file naming schema fit's the new name exactly. (for example if you add a stage
eastus2, the parameter file would need to be namedeastus2.bicep, the service connection variableserviceconnection_eastus2) and the references in thepipeline.ymlas well.
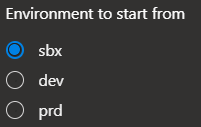
Last but not least, if you execute the pipeline, you will notice that runtime parameters such as
- name: startEnvironment
  displayName: Environment to start from
  type: string
  default: sbx
  values:
  - sbx
  - dev
  - prd
are rendered as

effectively allowing you to choose the environment to start from.
For example, you may want to carry out a 'Continuous Deployment', always starting from sandbox or sbx which is selected by default. Once the pipeline is executed and the sandbox stage concluded successfully, the pipeline would automatically continue with the next stage in line (by default, development or dev), and so on.
However, you may also opt-in to start the same process directly from the development stage by selecting the corresponding radio button. The pipeline will then directly start from that stage and, like before, continue with is successor (in this case production or prd).
If you have no need for a staging approach, you can also remove any trace of it. For a full cleanup, carry out the following steps:
-
In the
pipeline.ymlfile-
Remove the runtime parameter
startEnvironmentcompletely -
Remove any but the first stage and reduce it to
- stage: Deployments
  displayName: Deploy
  jobs:
  - template: .templates/<originalTemplateReference>
    parameters:
      <<Keep all template parameters but `environment`>>
for example
- stage: Deployments
  displayName: Deploy
  jobs:
  - template: .templates/pipeline.jobs.yml
    parameters:
      deploymentsToPerform: '${{ parameters.deploymentsToPerform }}'
-
-
In any pipeline template file (in the
.templatesfolder),-
remove the
environmenttemplate parameter on the top completely -
remove any trace of
_${{ parameters.environment }} -
replace the
deploymentjobs with simplejobs. For example, replace- deployment: deploy_job displayName: Deploy Resources environment: ${{ parameters.environment }} timeoutInMinutes: 120 pool: vmImage: '$(vmImage)' name: '$(poolName)' strategy: runOnce: deploy: steps:
with
- job: deploy_job
  displayName: Deploy Resources
  timeoutInMinutes: 120
  pool:
    vmImage: '$(vmImage)'
    name: '$(poolName)'
  steps:
NOTE: Make sure to indent the existing steps correctly to the left as YAML detects elements based on their indent
-
-
In the pipeline's
variable.ymlfile, reduce all environment-replicated variables (for examplesubscription_sbx&subscription_dev) to a single variable and remove it's environment reference (for examplesubscription) -
Rename any parameter file from for example
sbx.bicepto.bicep
Core
Shared concepts