Venn's command line interface for quick and easy setup of Venn Security Network
Follow these steps to secure your contracts with Venn:
-
Install the CLI globally by running:
npm i -g @vennbuild/cli
-
Auto-import the Firewall into your smart contracts by running:
venn fw integ -d contracts
-
Deploy your contracts like you normally would to any network
-
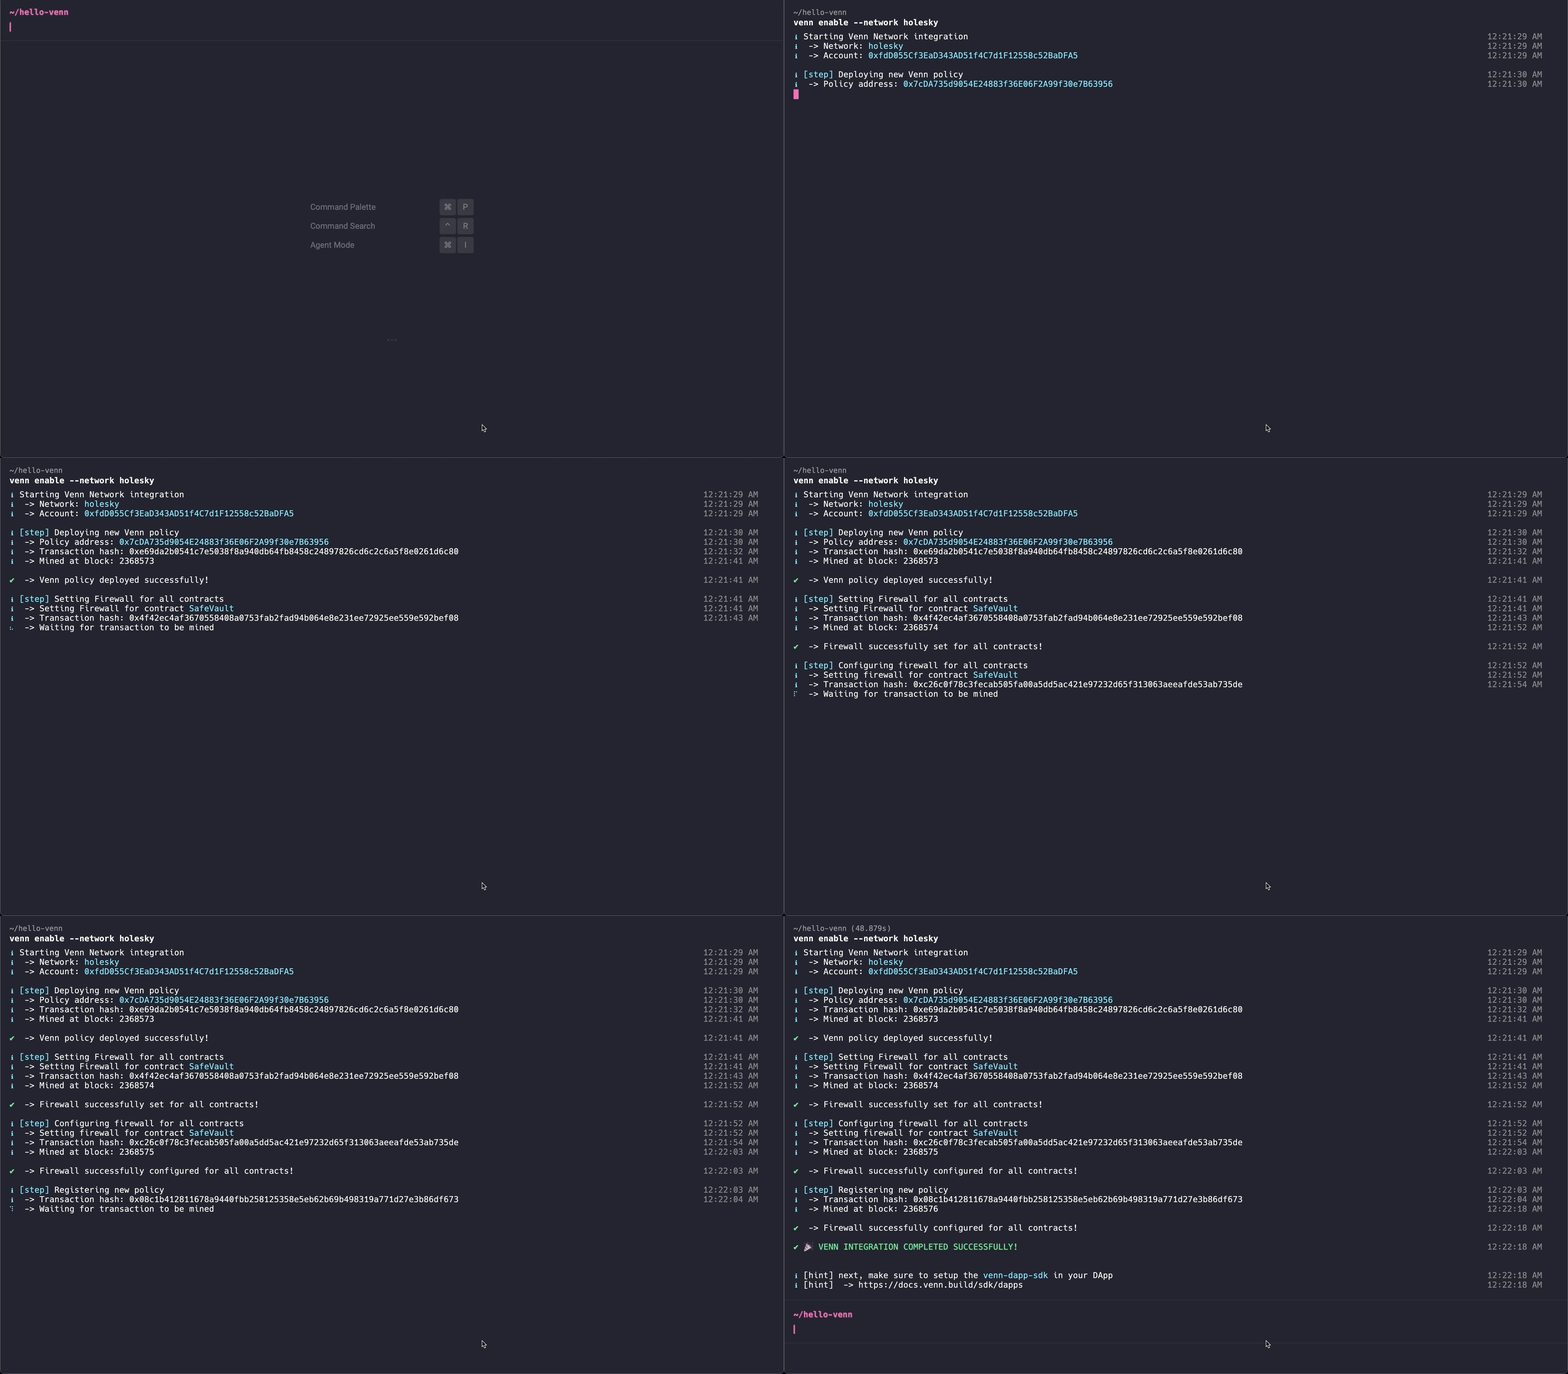
Finally, connect your contracts to Venn by running:
venn enable --network holesky
- 🚀 Quick Start
- 📦 Installation
- 📚 Usage
- ⚙️ Configuration File
- ⚡ Available Commands
- 💬 Support & Documentation
- 📜 License
npm install -g @vennbuild/cli💡 Note: Venn CLI is compatible with Solidity versions
>= 0.8
There are 3 steps to the integration.
-
First, add the Firewall SDK to your smart contracts, and deploy them as your would normally deploy to any network.
-
Next, connect your deployed smart contracts to Venn.
-
Now that your project is secure, only approved transactions will go through.
To approve transactions, make sure to add the Venn DApp SDK to your DApp's frontend.
This integration will add the Firewall SDK to your smart contracts, making sure that they import the relevant modifiers, and apply the modifiers on external functions.
Auto-import the Firewall SDK into all of your smart contracts in one go by running:
venn fw integ -d contractsThis command will scan all your smart contracts under the contracts folder, and add an import of the VennFirewallConsumer Firewall SDK.
pragma solidity ^0.8;

contract MyContract {

    myMethod() {
        ...
    }
}pragma solidity ^0.8;
import {VennFirewallConsumer} from "@ironblocks/firewall-consumer/contracts/consumers/VennFirewallConsumer.sol";
contract MyContract is VennFirewallConsumer {
myMethod() firewallProtected {
...
}
}See the Available Commands section below for additional integration options
This integration will connect your Firewall protected smart contracts to the Venn Network onchain. It does this by sending setup transactions onchain to register your smart contracts with Venn.
-
Make sure your smart contracts are deployed and that you have completed the Firewall Integration step above
-
You will need your private key for this step
-
Create a new file called
venn.config.json -
Add the following configuration snippet to it:
{ "networks": { "holesky": { "contracts": { "MyContract1": "0x1234abcd1234abcd1234abcd1234abcd1234abcd", "MyContract2": "0x1234abcd1234abcd1234abcd1234abcd1234abcd", } } } }- Each key in the
contractsobject is the Name of the contract - Each value in the
contractsobject is the Address of the contract
- Each key in the
-
Create a new environment variable called
VENN_PRIVATE_KEYwith the private key that deployed your smart contracts⚠️
IMPORTANT: This key must be the same key that deployed the smart contracts
Run the following command to connect your Firewall protected smart contracts to Venn:
venn enable --holeskyAfter successfully connecting to Venn, a new Venn Security Policy will have been created for you.
The address of the policy will be saved in venn.config.json:
{
    "networks": {
        "holesky": {
            "contracts": {
                "MyContract1": "0x1234abcd1234abcd1234abcd1234abcd1234abcd",
                "MyContract2": "0x1234abcd1234abcd1234abcd1234abcd1234abcd",
            },

            // YOUR VENN POLICY ADDRESS
            "policyAddress": "0x123..."
        }
    }
}
You will need this address when integrating the Venn DApp SDK
Venn CLI uses venn.config.json as it's configuration file, expected at the root folder of your project.
Overall, the configuration file has the following structure:
{
    "fw": { /* ... */ },
    "network": { /* ... */ }
}For the Firewall integration, you can configure which folders to include or exclude from the integration, using the following configuration:
{
    "fw": {
        "integ": {
            "include": ["my/contracts/folder"],
            "exclude": ["tests/fixtures/**/*.sol"],
        }
    }
}Acts as a whitelist.
If this configuration is not empty, only files inside the configured folders will be integrated with the Firewall SDK.
Acts as a blacklist.
If this configuration is not empty, files inside the configured folders will not be integrated.
For the Venn Integration, you configure which networks to integrate with, and list the contracts that you have deployed per networks:
{
    "networks": {
        "holesky": {
            "contracts": {
                "MyContract1": "0x1234abcd1234abcd1234abcd1234abcd1234abcd",
                "MyContract2": "0x1234abcd1234abcd1234abcd1234abcd1234abcd",
            }
        }
    }
}
Note that the key is the name of the contract, and the value is the address of the contract.
When Venn CLI registers your smart contracts with Venn onchain, it sends several setup transactions for this registration to happen.
The account that signs these transactions is provided to the CLI by setting the following environment variable:
VENN_PRIVATE_KEY
The account that owns the deployed contracts
This is the root command.
-
--help
show help information -
--version
show version information
Subcommand for managing the Firewall SDK integration with your smart contracts.
-
-f, --file <file path>
specify a single smart contract file for the integration -
-d, --dir <folder path>
specify a directory of smart contracts for the integration -
-r, --rec
if specified, will recursively look in<folder path>from--dir -
-v, --verbose
show verbose logging
venn fw integ -f contracts/MyContract.solvenn fw integ -d contracts/vaultvenn fw integ --r -d contractsRegister your Firewall protected smart contracts with Venn.
--network <network>the network where your smart contracts are deployed to
venn enable --network holskeyUnregister your Firewall protected smart contracts from Venn.
--network <network>the network where your smart contracts are deployed to
venn disable --network holskeyWe're here to help.
-
Join the discussion on Discord: Venn Discord
-
Read the docs: Venn Documentation
Venn CLI is released under the MIT License.
The Venn CLI showcases how to easily integrate with Ironblocks' Firewall.


